All of the photos of the wedding and in this post were taken by Brookelyn Photography. To see more of her work visit Brookelynphotography.com. She did a fantastic job with the entire wedding, and I'm so thankful she was able to photograph some of my arrangements for me.
Thank you to my dear friends Matt and Chelsea for allowing me to be part of their special day by designing their floral work. The location of this wedding was at the South Coast Botanic Gardens in Palos Verdes, California. If you are having a country or garden wedding you may want to take some notes on some of their details!
Some details:
Guests brought blankets for the reception and checked them in upon arrival.
Lavender bunches as favors.
Messages left for the bride and groom.
It was a really beautiful July day, and I was able to get the flowers done right before being put on complete bed rest.
August 17th is National Honeybee Day, so it feels worth mentioning. There is a big event in Santa Monica (I believe at 3rd St. Promenade) to help bring awareness and celebrate the growing community of urban beekeepers and supporters of urban beekeeping, which I unfortunately won't be able to go to, but if you want more info, Honeylove.org will have a live feed on their YouTube channel or you can go in person if you are in the area and interested!
It is an event where dressing in black and yellow is encouraged and I'm sure involves trying and tasting honey products! They range from making seed bombs to trying honey or makeup products. I really hope to make it to more of these types of events in 2014. They really stress the importance of community for beekeepers to resemble the community of the bees we care for, so we can exchange experiences and tips with one another. Or if our brood gets too full, we can trade frames with others who want to expand their hives if we are wanting to maintain the current size to prevent swarming.
There is a learning curve for everyone regardless of how long you've been doing it, and this community is generous in sharing their knowledge. I encourage you all to check it out, and please let me know if you went and share your experience/thoughts on the event with me!
Problem: Our hive lost its queen! She abandoned the hive, making for distraught bees buzzing loudly to communicate their discontent for a hive lacking in order and purpose. Without a queen laying eggs for the nurse bees to care for, their chain of order is all thrown off.
The total development time for bees is as follows:
-16 days for a queen
-21 days for a worker
-24 days for a drone
So, hopefully it won't be too long before order is restored and a queen is made.
Solution: We put newspaper on top of the top hive box and placed another hive box on top and added some bees from another hive who will make a new queen. The hope is that they will then chew through the paper and join our current hive with the new one.
*When we originally moved them, we had some deformed bees resulting from disruption during development. It goes to show how important it is to have careful gestational attention in even the smallest of creatures. Those bees are gone now since their life span is only up to 6 weeks long, and they are growing and strong still despite having lost their leader.
We now have 4 hive boxes.
Harvesting Honey tips:
Nectar mixed with honey will ferment the entire batch. Harvest must be capped honey only, which assures us that no extra moisture gets in for bacteria growth, so it is crucial to not be impatient as we wait for a full box that is ready to harvest.
Otherwise, honey never goes bad. If it crystallizes, you can use it as is in coffee or tea, or if you prefer you can place it in a pot of water to warm it and melt the crystals.
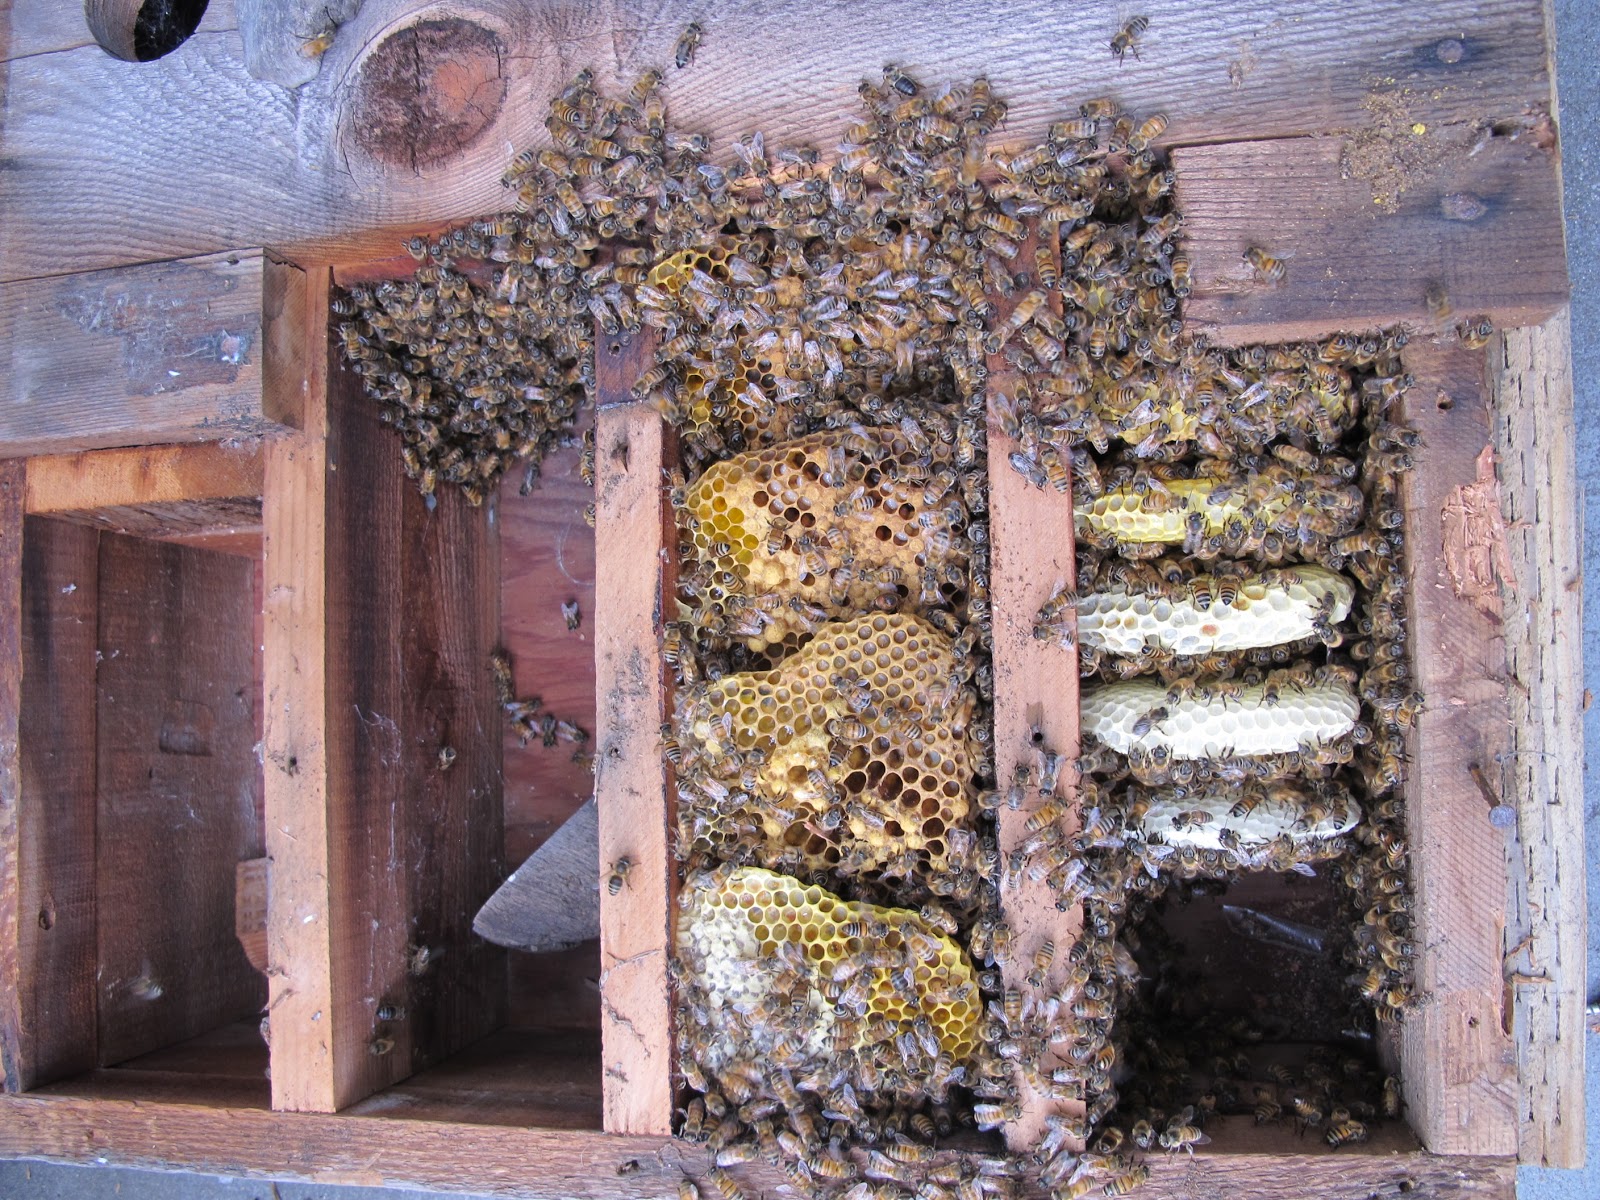
We finally did the hive cut out and transfer of our first bee hive. It took a while for things to fall into place. We originally wanted to keep them on our roof, which was not recommended in the end because of difficulty of getting honey up and down the ladder (because a half size hive box when filled with honey is 45 lbs). Then when we went to move them, we discovered they swarmed just hours before we were supposed to do the job! I've never seen a swarm before this, and it was a crazy thing to have thousands of bees buzzing above our house loudly as they tried to find a new home. We lost about 1/3-1/2 of the hive, which meant the worker bees left behind had to make a new queen (and we saw her cell when we did the transfer...a peanut shaped comb on the edge). But in the end, someone offered our mentor a public piece of land in Manhattan Beach to keep her bees and she's allowing us to keep ours beside hers, so it worked out perfectly. They are still close to home to visit weekly, but are out of the way of people traffic.
This was probably one of the coolest things we've ever been a part of. We learned how to recognize the different purposes of their comb: the brood comb, drone comb, honey comb, bee bread (what they feed the larvae), nectar storage, and queen cells. It's one thing to read about it, and it's another to interact and witness it. We even saw a drone emerging from one of the cells, eating his way out as we moved him into the new hive. It was this moment that felt like we were part of a National Geographic segment. We found a capped queen cell, which means they were probably preparing to swarm again, so hopefully they will adjust nicely in their new home and stay since we moved them soon enough.
They seem to be very docile bees. We didn't get stung at all, and not very many died in the process of transferring them, which I was really happy about. We are hoping that in about a year we'll get our first batch of honey. We will only take what is excess, so it'll be a while before they've made more than they need. In the mean time, we will keep them happy, and protected from ants!
Here are some video clips from the process of the cut out:
We cut each individual comb out of the bird house and put them in frames with rubber bands to hold them in place. The bees will fix the comb and continue to make more, and when they are done they will remove the rubber bands and place them outside the hive for us to throw away.
By the end we were scooping up bees by the cup full and adding them to the hive box.
Then we put the hive where the bird house hive used to be, and at night when everyone went to sleep, they all crawled inside, and we taped them up and moved them to their new location.
Once at the new site, we put leaves and sticks on their landing pad at the entrance of their hive, so that when they emerged in the morning, they would have to slow down, recognize their location has changed, and then they recalculate their internal gps to fly back to this new location after foraging. So far they are still there and seem to like the change, so we'll see how their growth as a hive continues.
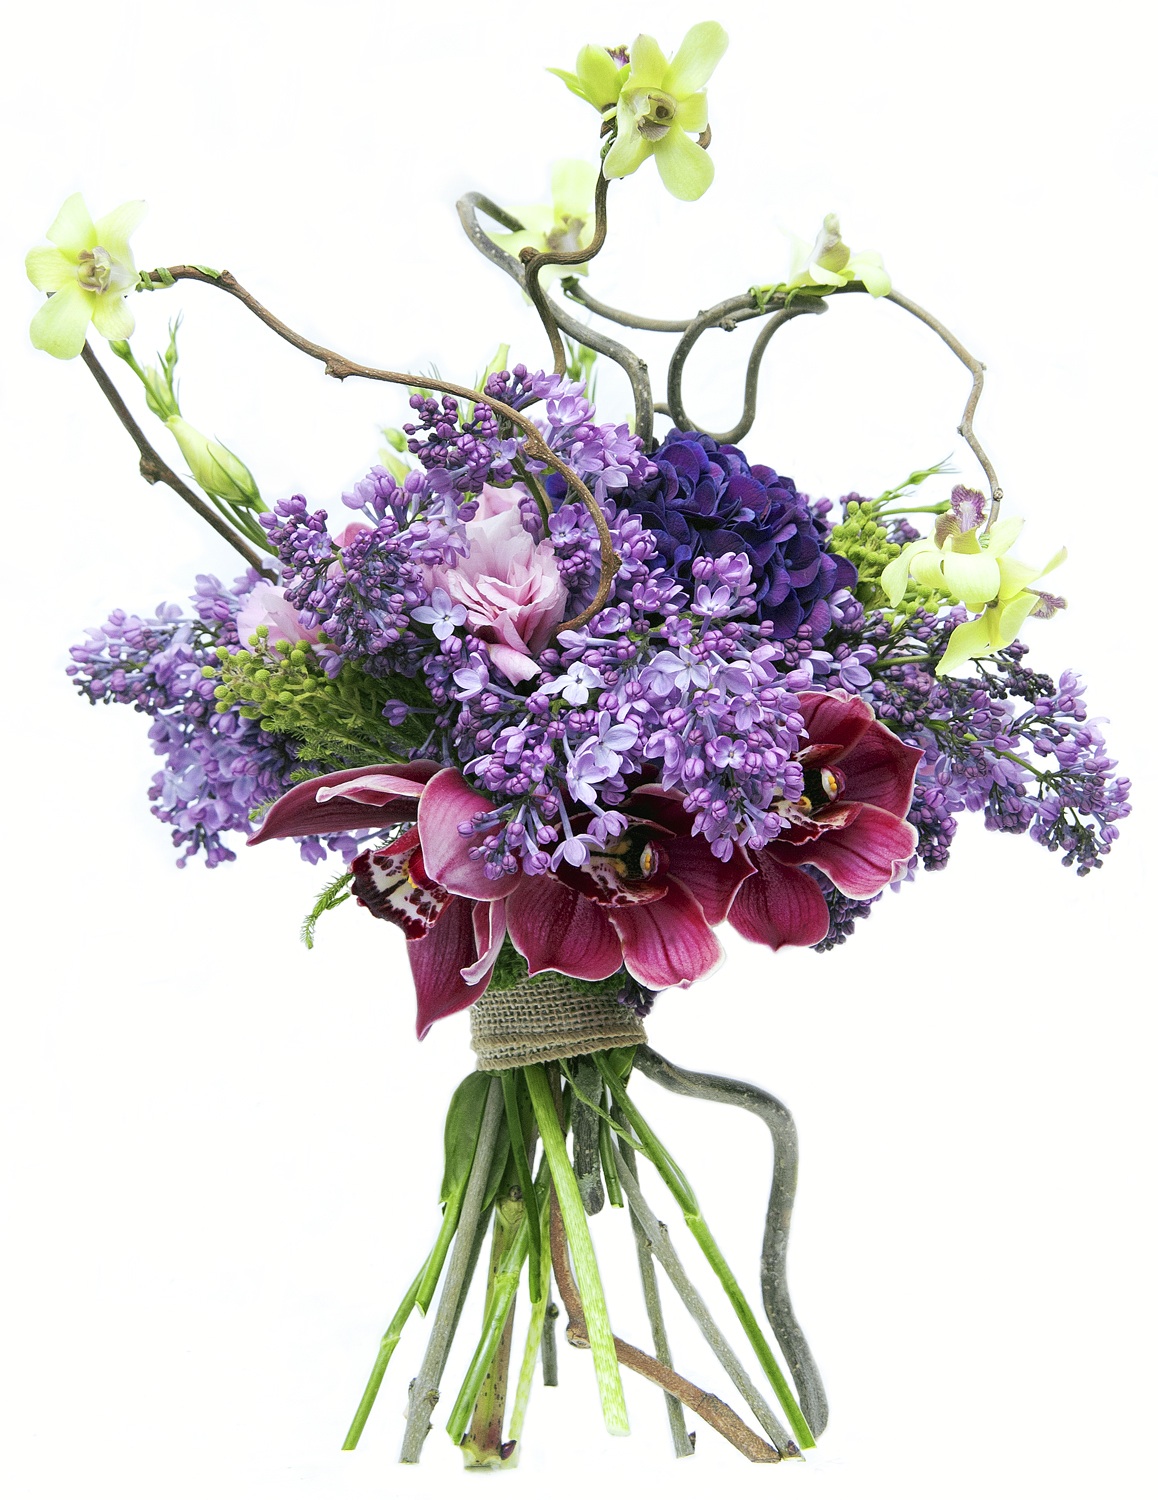
I'm submitting for a contest, and the theme is "Second Time Around," as in a bridal bouquet a bride would want at her second wedding. This is what I made and am submitting.
I read that the second time around it's often recommended brides where a light pink, so I tried to use colors complementary to that. And I wanted to use a little different approach to the traditional bouquet by using a base of kiwi branches and wiring dendrobium orchids to it. Other flowers used are: lilac, cymbidium orchids, lisianthus, hydrangea, calla lilies. The ribbon binding is Jute.
I've been working on the back yard for a while now, and I think I've finally come up with a design that we will enjoy spending time in. Here are some progression photos of before and after.
1. The first step was getting it to this point. It started with piles of wood and trash, and it was overgrown with weeds worse than this.
2. This is the almost finished product. I want to get a bench for along the fence and maybe a fire pit for the middle on the stones. And possibly add some hanging plants on the back wall above the tree to add more height. But for now, I'm really happy with the progress.
The view from the balcony looking down.
I made the retaining wall with old wood from a shelf we took down in the garage. The house was built in 1926 by my great grandmother, and I'm pretty sure it's the original wood, so I wanted to keep it as part of the house, plus I like the idea of recycled wood, and the patch work look.
Because it's a beach house, the back yard is sand, so any plants we have need to be in above ground planters or pots, and even still I plant things whose roots don't mind some sand so they don't rot when they get deeper. I'm excited about the dwarf orange tree in the wine barrel. We really love growing edibles even in our small space.
Under the stairs there isn't a lot of direct sun light during the day, so I started this bed as vegetables, but have progressively altered it to be a succulent garden so it looks nice all year round. My hope is that behind it, under the house we can eventually make a home for a couple chickens to have our own eggs, but for now, it is still a project for the future.